Viewing DataHub Outputs
DataHub can display different outputs such as Point Clouds, Orthophotos, and Terrain Data. In this article you will learn more about how to display and configure them according to preference.
Orthomosaic + Terrain view
This is the default view in DataHub. The generated orthophoto wrapped onto the generated surface model of the site is displayed to view the project in a 3D Perspective.
Clicking the settings icon triggers the opacity slider for the orthophoto.
More options are available in the 3D Mesh dropdown under the Imagery tab from the left sidebar:
Contour Lines
Contour lines can also be displayed in DataHub, the data will be based on the generated Digital Surface Model or Digital Terrain Model, whichever is selected. Clicking the settings icondisplays the input fields for the Minor and Major line spacing for the contour lines.
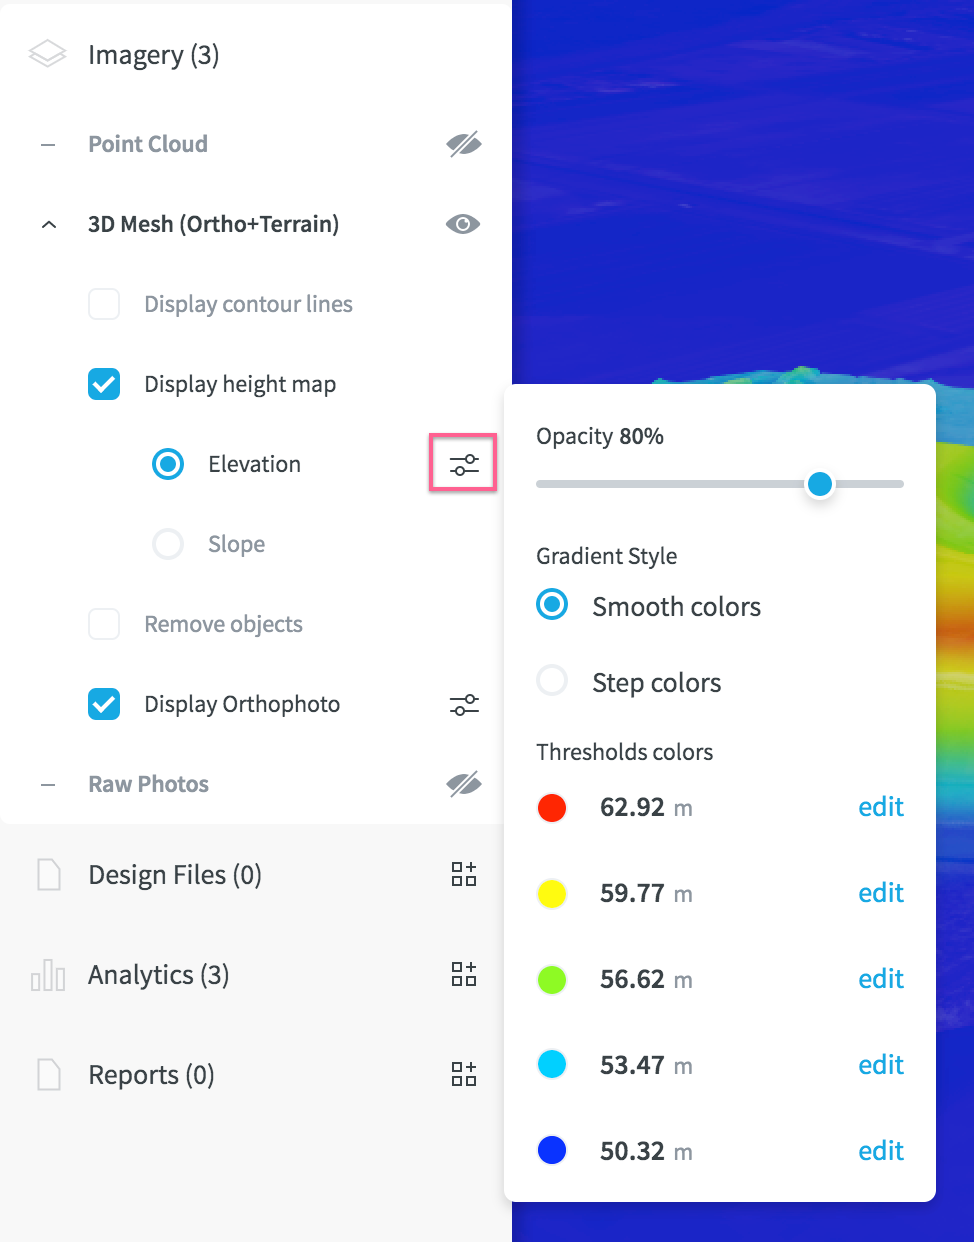
Height Maps
The Display Height Map option colorizes the terrain according to elevation or slope.
Clicking settings icondisplays the opacity slider and other configurations available for the height maps:
Remove Objects
Selecting the Remove objects option will display the digital terrain model (DTM). The DTM is an elevation model which focuses on the bare ground--removing all objects on top of it.
Orthophoto (2D View)
A 2D view of the site can also be displayed by clicking on the three-dot button on the right side of the screen and selecting the "Switch to 2D" option. This will let you view the orthophoto without the digital surface model.
3D Mesh
The 3D Mesh can also be viewed by toggling the 3D Mesh View in the left sidebar.
For a closer look at how to toggle the Real 3D Mesh visualization, please visit our FAQ article: FAQ: How To Toggle the Real 3D Mesh Visualization in DataHub?
Point Cloud
Selecting this option under the Imagery tab will display the point cloud which can be in 3D perspective. The dropdown menu also includes the remove objects option which serves the same purpose. Clicking the settings icontriggers the opacity slider for the point cloud.
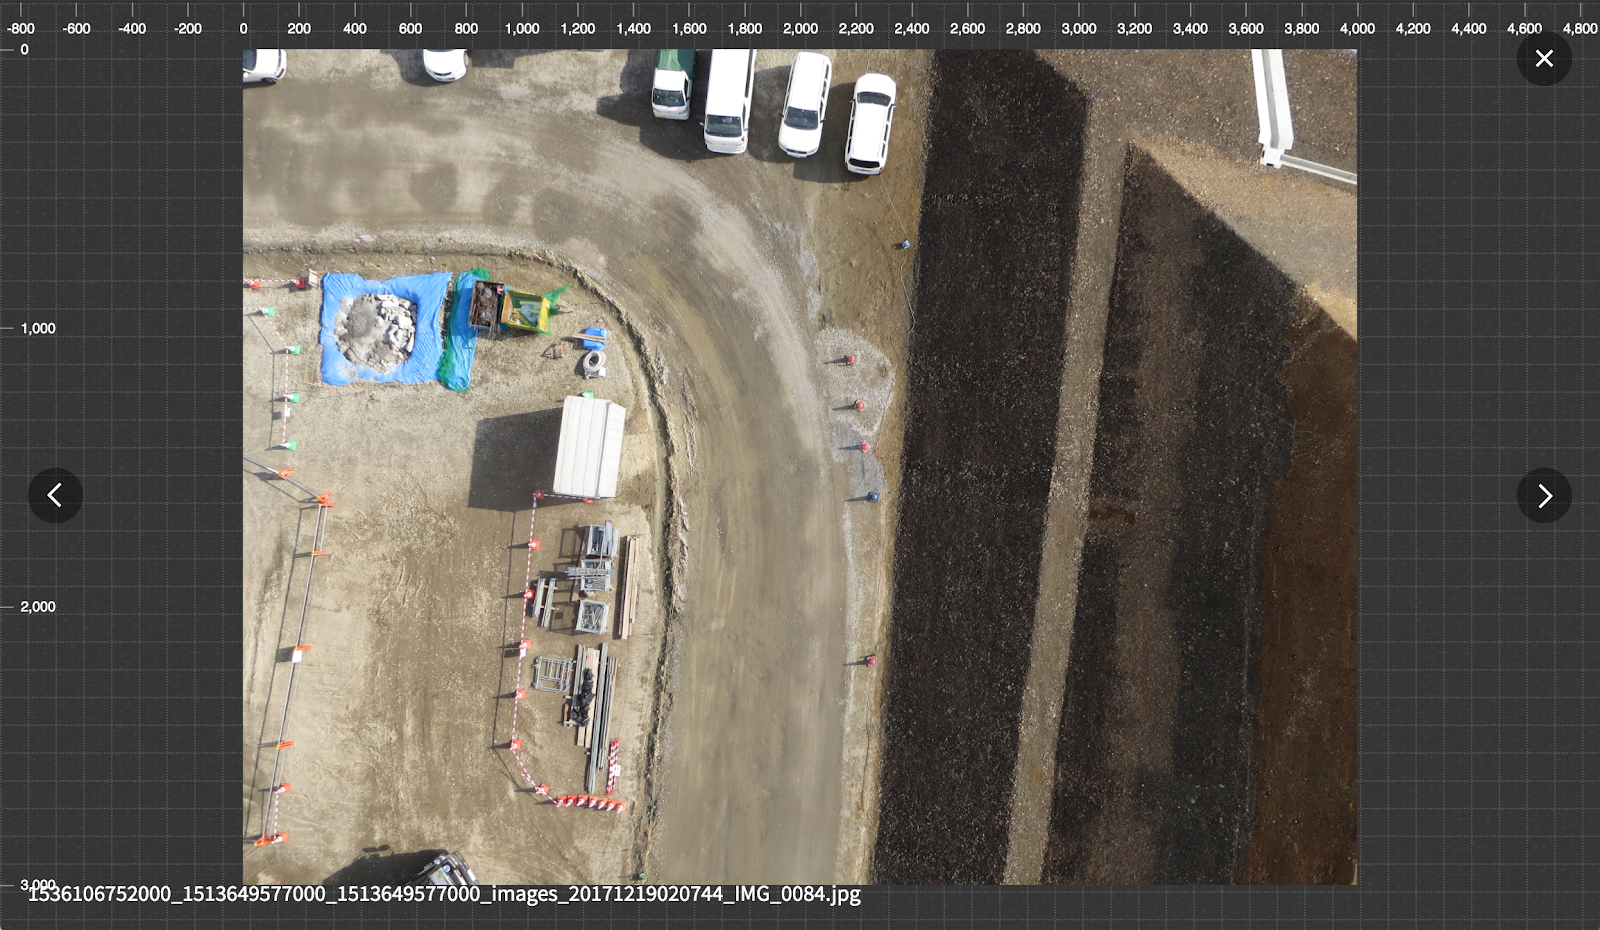
Raw Photos
Selecting this option under the Imagery tab will display the image positions during the flight mission. Clicking on the individual positions will let you view the image captured:
Comments