Basic Volume Analytic
DataHub creates 3D models of your sites based on the point clouds generated by our photogrammetry engine. Thousands to millions of points are interpolated to create a high-resolution reconstruction of your captured area. The outputs are then made available for DataHub tools that can help you analyze your data further.
In this article we will explain how to use the basic volume tool in DataHub to gather valuable data of 3D entities.
How to use the Basic Volume Analytic
You may access the Analytics section of DataHub either through the quick menu in the lower right corner (Blue + Button) or by clicking on the add button beside Analytics menu in the left sidebar (Create New Analytic - Basic Volume):
1. You can upload a geometrics file that contains the corner coordinates the area you would like to select. This will automatically generate the polygon of the area of interest.
To download a geometrics file from an old analytic, open the analytic and click on the menu options inside the analytic drawer. Choose between downloading a .csv or .geojson file.
On the other hand, you can also start from scratch by first naming your analytic. In the example below, we are starting from scratch:
2. The app will display an Instruction banner at the top of the 3D map panel. You may now start clicking the map to draw the polygon. Clicking three points will generate a closed polygon.
3. When the initial polygon is created, drag the large circles to a desired shape. To add points, drag the smaller dots in the middle of each polygon side. To delete points, click them once then click the Delete button that is displayed at the point.
4. You can manually adjust the coordinates of the points by selecting the three dots menu of the point you wish to update and choosing Set Coordinates. Additionally, you can click the row in the drawer and look for the red point in the 3D map panel.
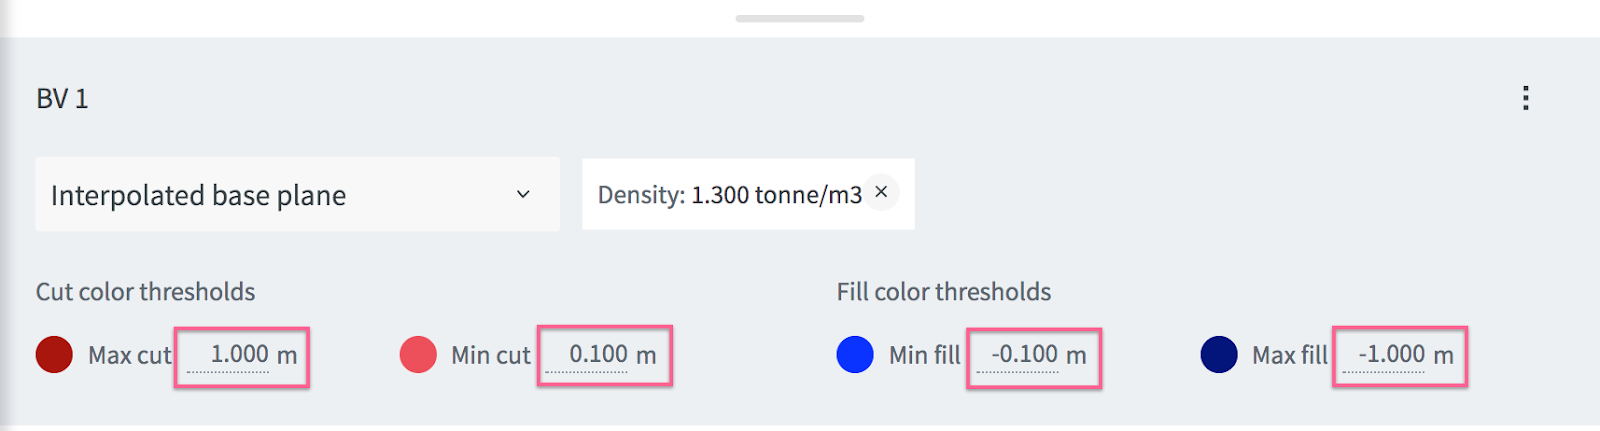
5. In the bottom drawer select an option for the base plane. There are three options:
a. Interpolated: choose this to have Skycatch software automatically create a best-fit plane based on the boundary of the polygon
b. Reference Level: choose this to specify a flat plane at a specific elevation
c. Custom: choose this to set the elevation of each point of the polygon and create a customized base plane
6. When done, click Done to save your progress and calculate the volume measurements for the polygon. These values will be displayed in the bottom drawer.
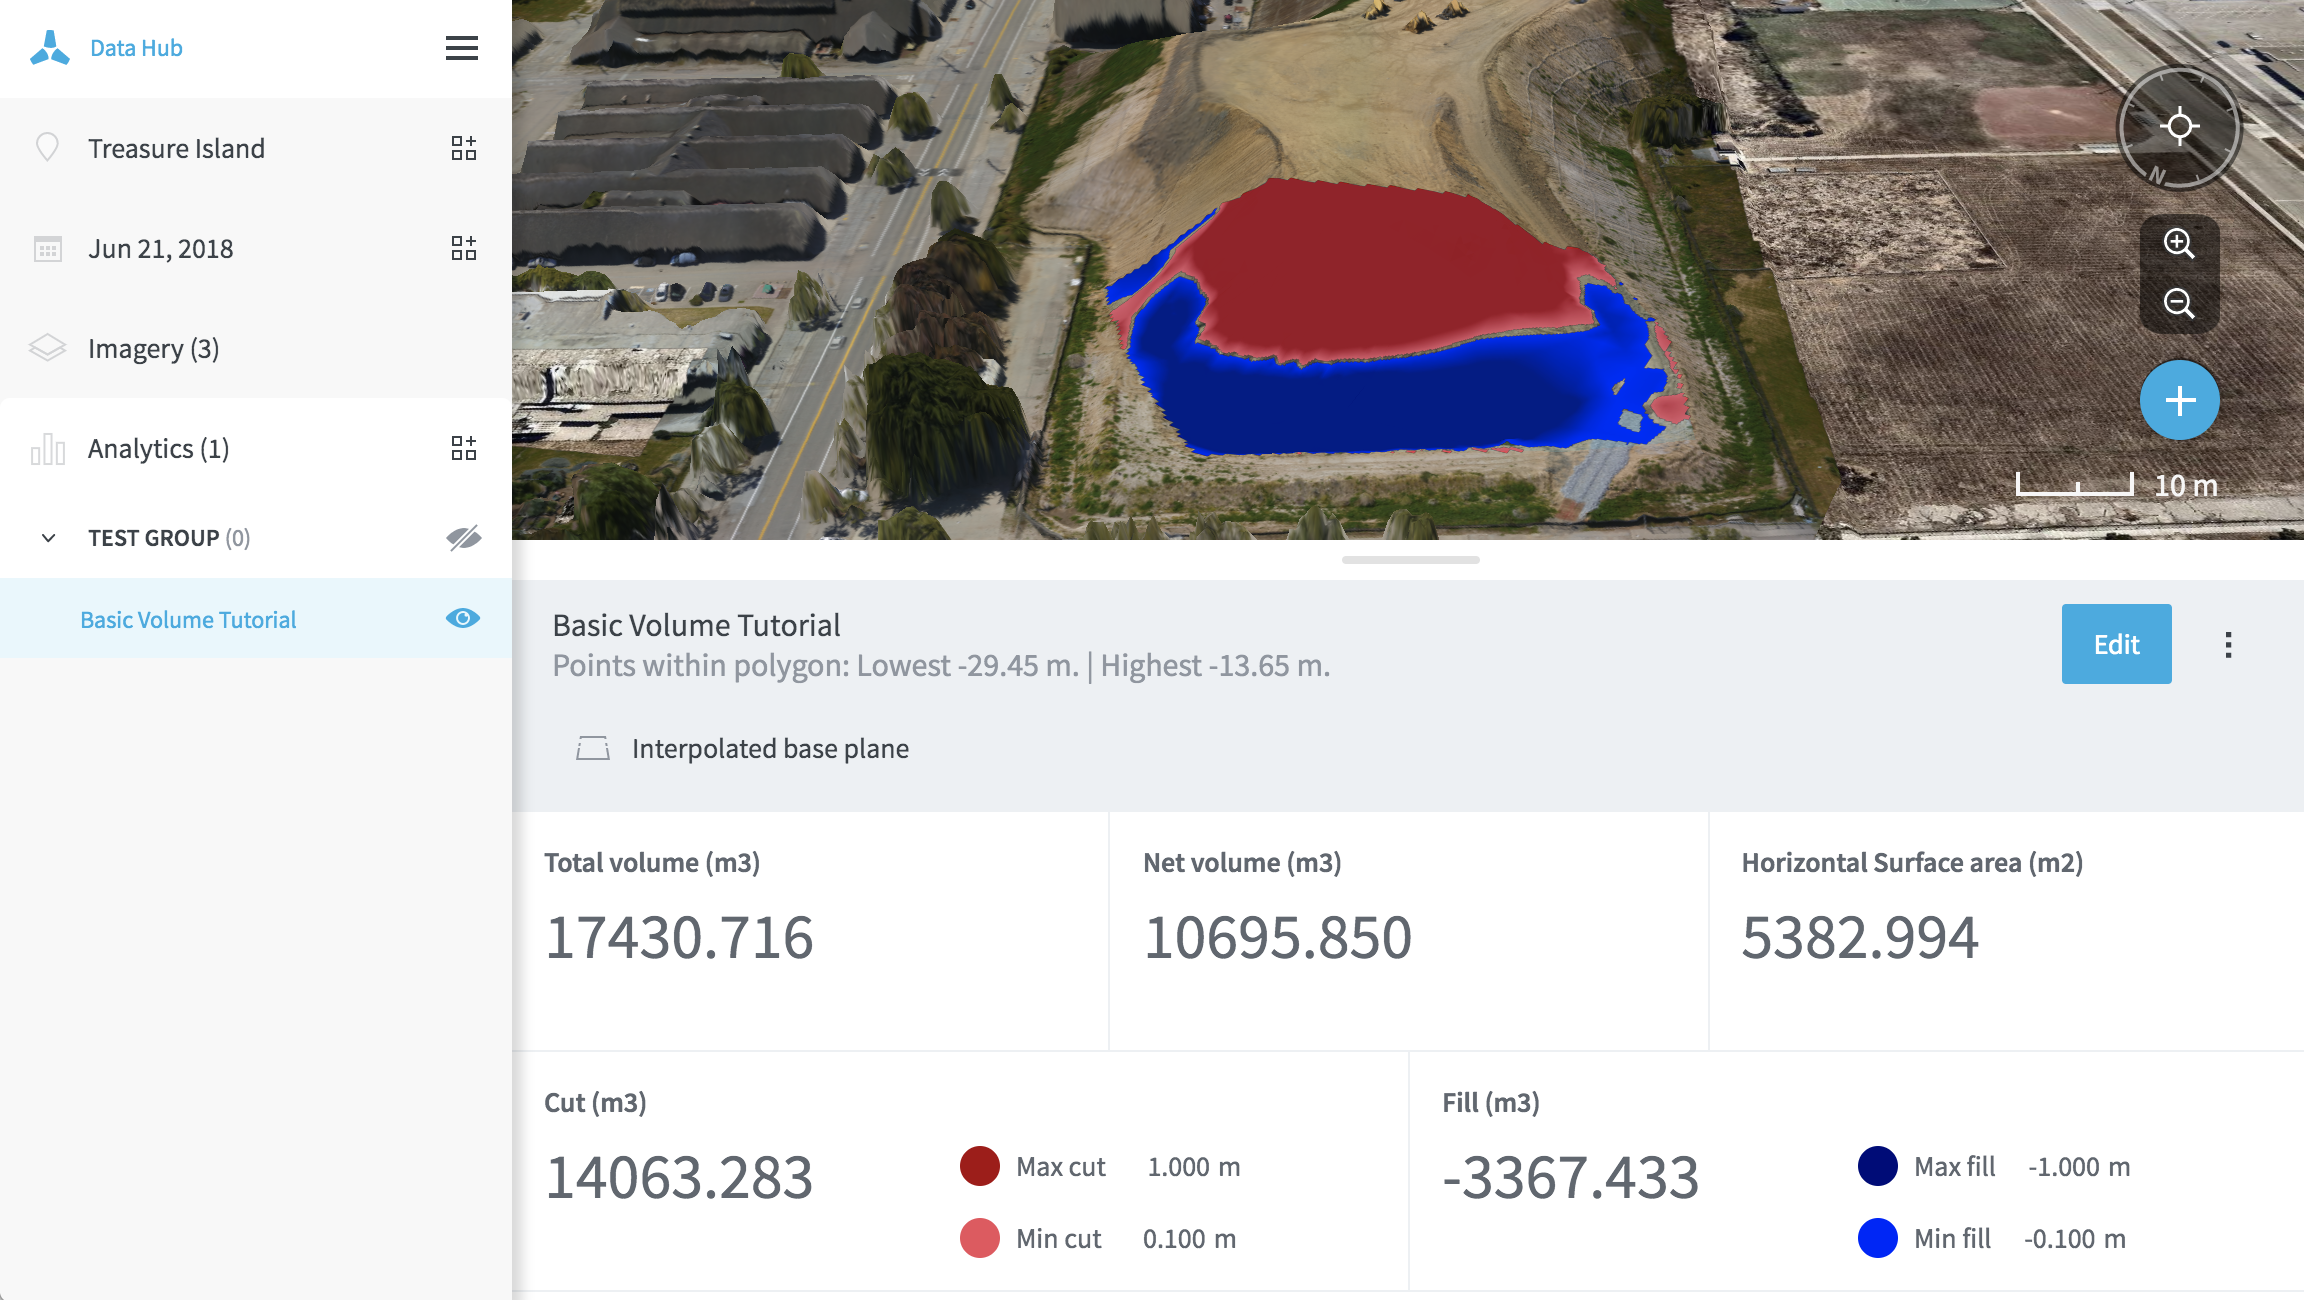
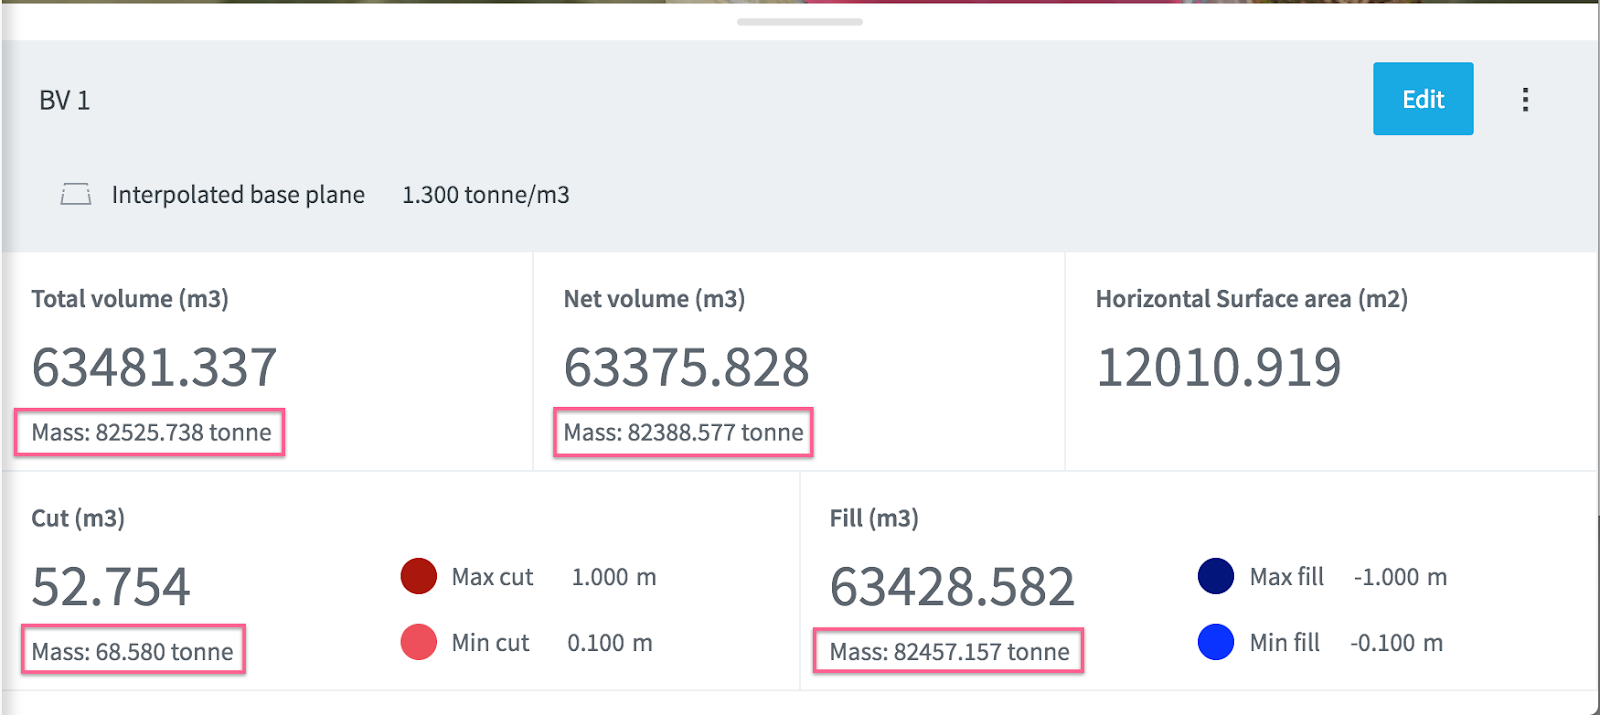
7. To enter a density and get mass values, click the Edit button at the top right of the bottom drawer to enter edit mode. Click Add Density, enter the value, then click Done. The calculated mass value will be displayed for each volume value.
Editing the Basic Volume Analytic
- To edit the points of the polygon (move, delete, or add more points) or edit the base plane type or level, enter edit mode and make the changes. When the polygon or the base plane is changed, the volumes will be recalculated.
- To change the elevation value associated with each color of the heatmap (known as “thresholds”), enter edit mode and click the value you wish to change, then click Done. The heatmap will update.
- To perform additional actions, click the three dots button to the right of the Edit button:
a. Rename or delete the analytic
b. Download the calculation results in a CSV file
c. Export PDF report
Still Having Trouble?
Send us a message at support@skycatch.com!
Comments