FAQ: How to Use the Edge1 to Process Explore1 Captures?
Follow these steps for processing and exporting data in the field on the Edge1 base station:
Insert the MicroSD card into the MicroSD slot or a USB drive into either the USB 2.0 or USB 3.0 port of the Edge1.
The removable storage device will be displayed in an expandable drawer at the bottom of the app. Tap it to expand, then tap Import to move the photos and logs from the removable storage device onto the Edge1.
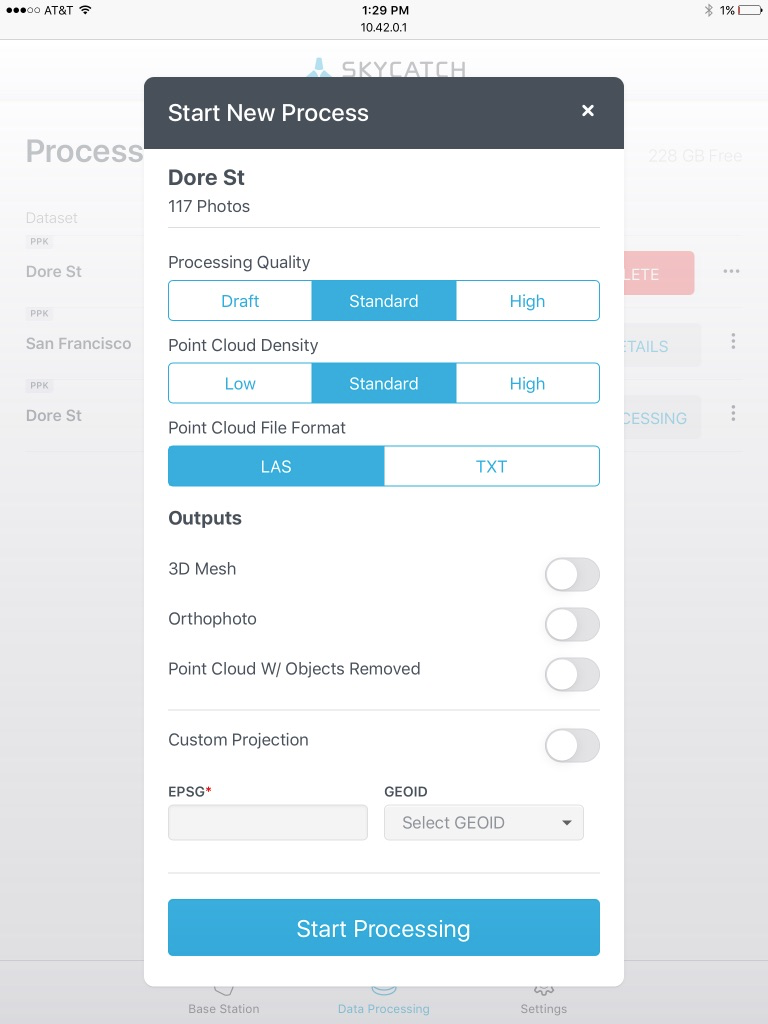
When the import is complete, tap Process to start processing. Select the quality, density, file format, outputs, and projection of your mission for processing.
HIGH Quality has accuracy between 4cm and 7cm
NORMAL Quality: 6cm to 11cm
LOW quality: 9cm and above
HIGH density: 12.5cm
NORMAL density: 25cm
LOW density: 50 cm
Note: Processing quality is related to the accuracy of processing. Accuracy can vary depending on the site. You can expect that:
Note: For Point Cloud Density, the Beta and the upcoming versions have the following average point separations (distance to closest point):
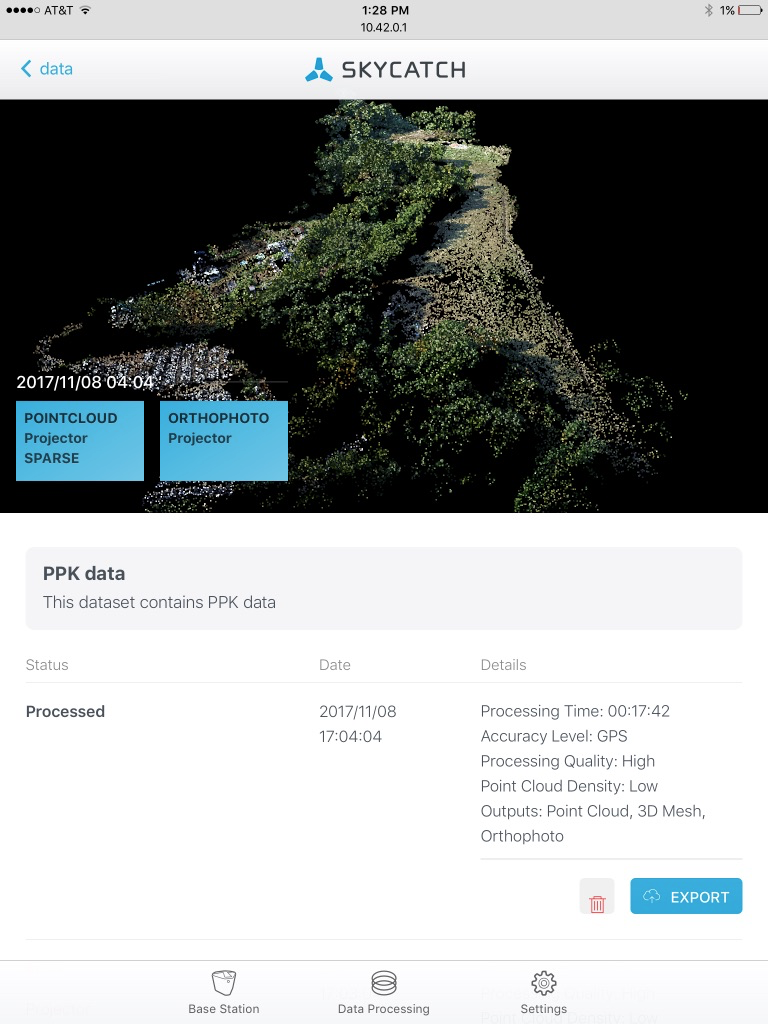
Once the data has been processed, the app displays the results of the processing job, along with the point cloud and ortho photo.
Export the data by following these steps:
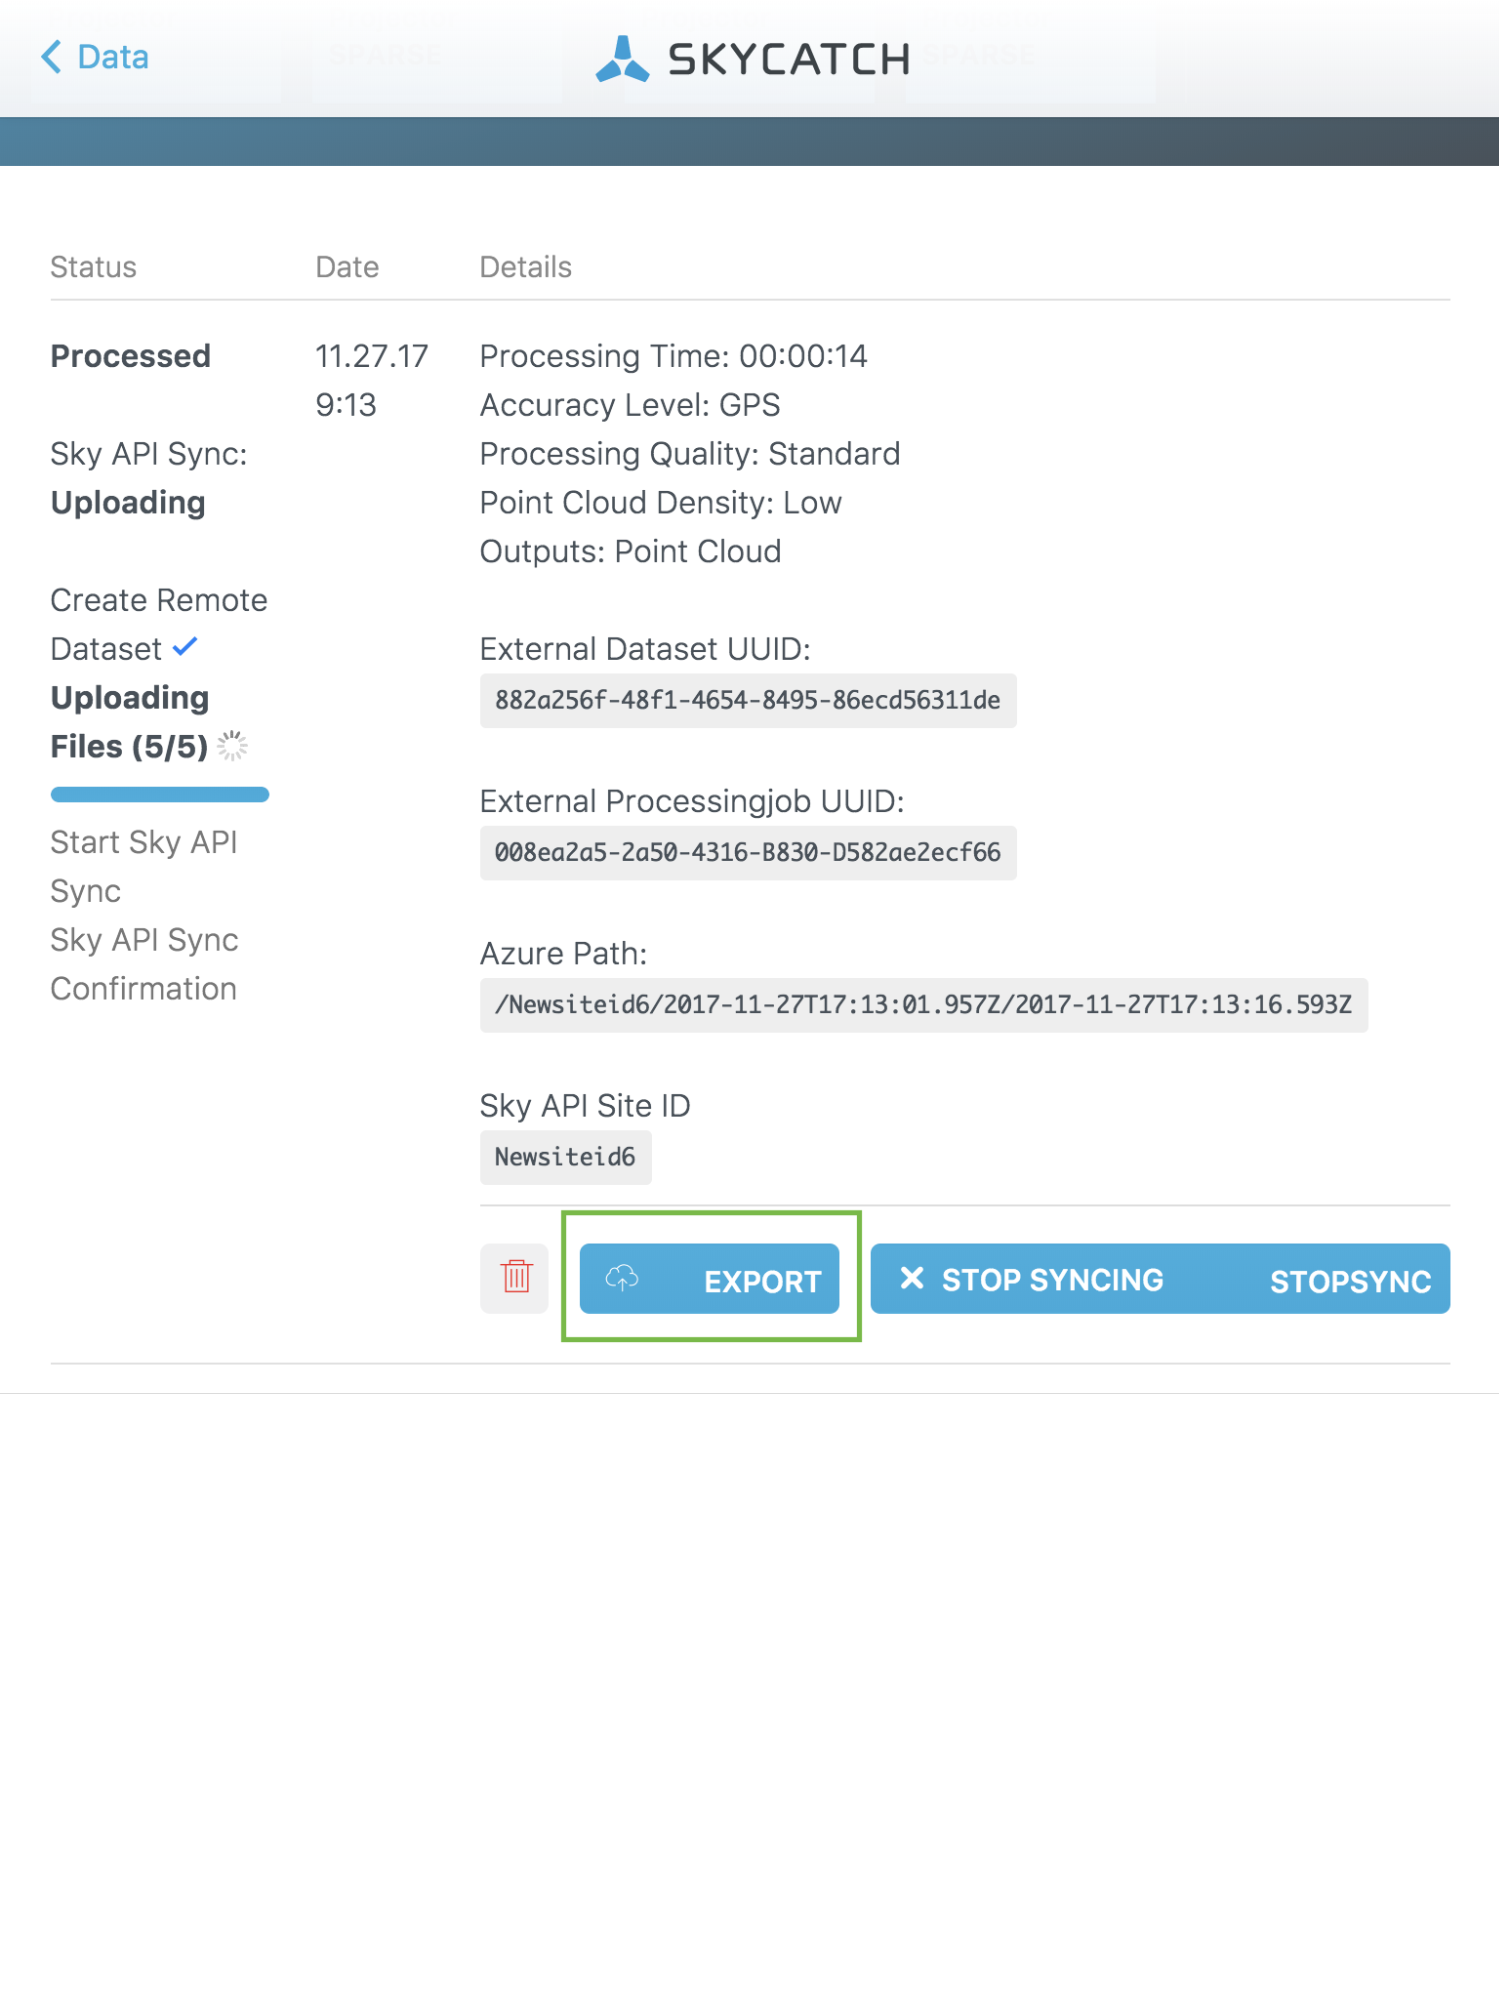
To Export, tap the Export button listed with the completed processing job on the Details screen. This will allow you to export to an SD card or USB drive.
Comments